


Since my project will be hosted on Azure App Services I want to ensure that every pushed commit will land in cloud environment and will be available outside of my local, dev machine. As close to it’s intended, production-like environment as possible. And with Azure App Services you can achieve basic continuous delivery without taking a sweat.
Let’s start with difference between continuous delivery and continuous deployment in case you’re wondering what’s the difference (term continuous deployment is in my opinion more commonly used). Long story short – delivery means you’re delivering to some kind of staging environment and you’re ready to deploy for production anytime from this moment and deployment means every pushed commit that’ll compile, pass unit tests etc. will land on production immediately. You can read more about differences here. I’ll focus on first term because you can really set it up 5 minutes (without advanced configuration of course) and I really wouldn’t recommend automating production deployments with such short and simple configuration (although as a bonus I’ll tell you where to look).
Let’s start. Open your Azure Portal (new one) and go to Azure App Services. Select your app and look for Deployment Options on it’s blade (fancy name for those tab thingies). Run it and connect to your version controll service. In february 2017 my screen looked just like that:
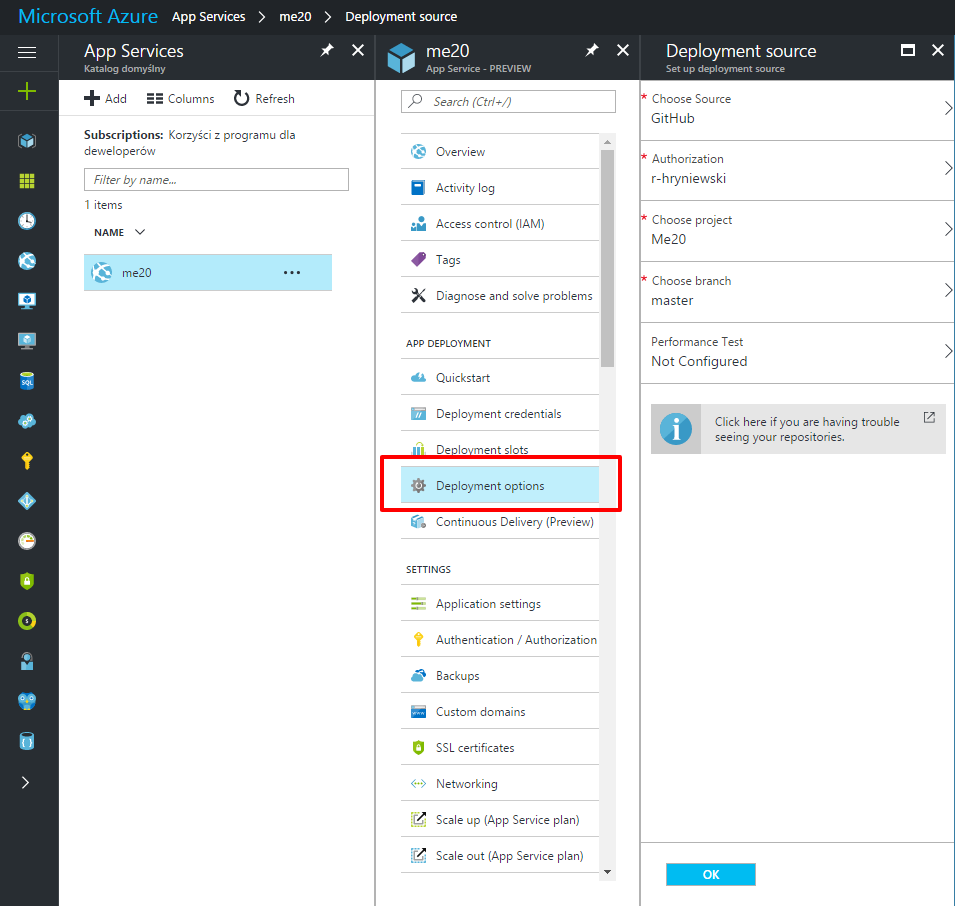
And that’s all (although you can link load test to after deploying). Next time you’l’ open Deployment Options you’ll see reports from your oh-so-automatic deploys. I could finish here but if you’ll look closely on screenshot above you’ll see Continuous Delivery option just beneath Deplotment Options. And while it still in preview now (february 2017) let’s try that.
As I told you before – continuous deployment is just git push-> magic -> compile -> deployment process. And it’s rather simple one. We don’t have control on tests, when should app be deployed and on which environment. Continuous Delivery tool gives us some those options and allows us to create this process as we really want it. So let’s do this now.
Configuration actually have some options now so you’ll complete it in 60 seconds rather than 30. As you could see Visual Studio Team Services account is required, it’ll be used for building and testing your code. It’s also a pretty nice version control itself if you’ll use good old git on it. After finishing configuration just click edit in options:
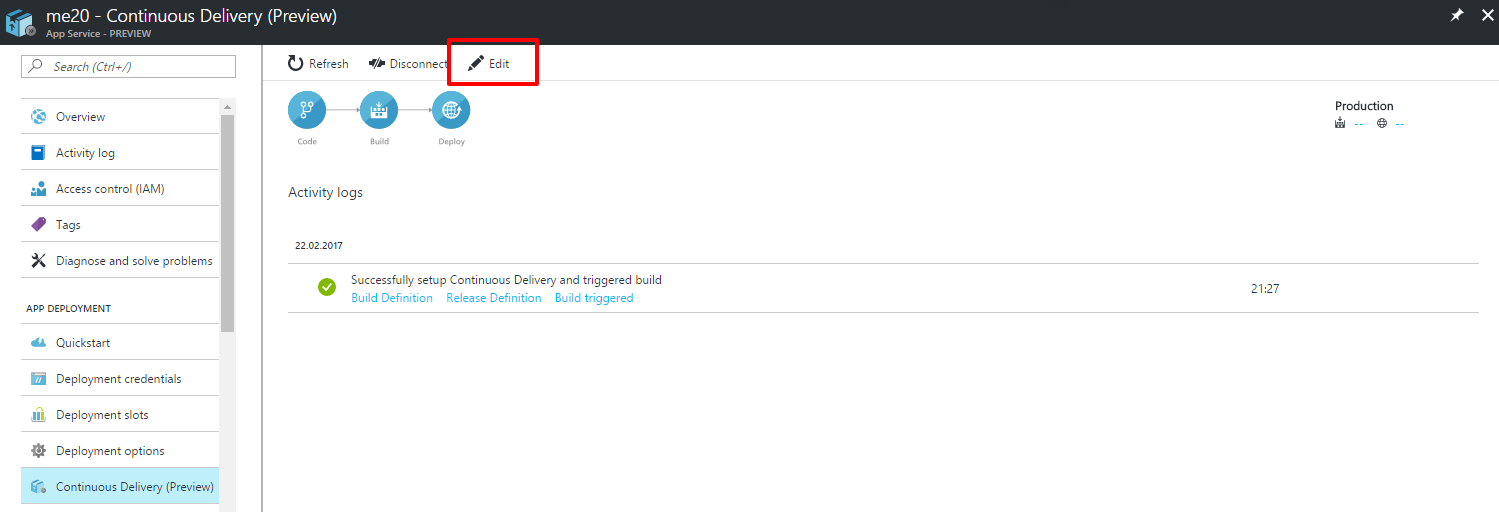
You’ll be redirected to your VSTS and there you’ll have a lot of possibilities to configure your delivery and deployment processes. When in new window you’ll select Explorer and then Edit on of the build processes you’ll see something like that:
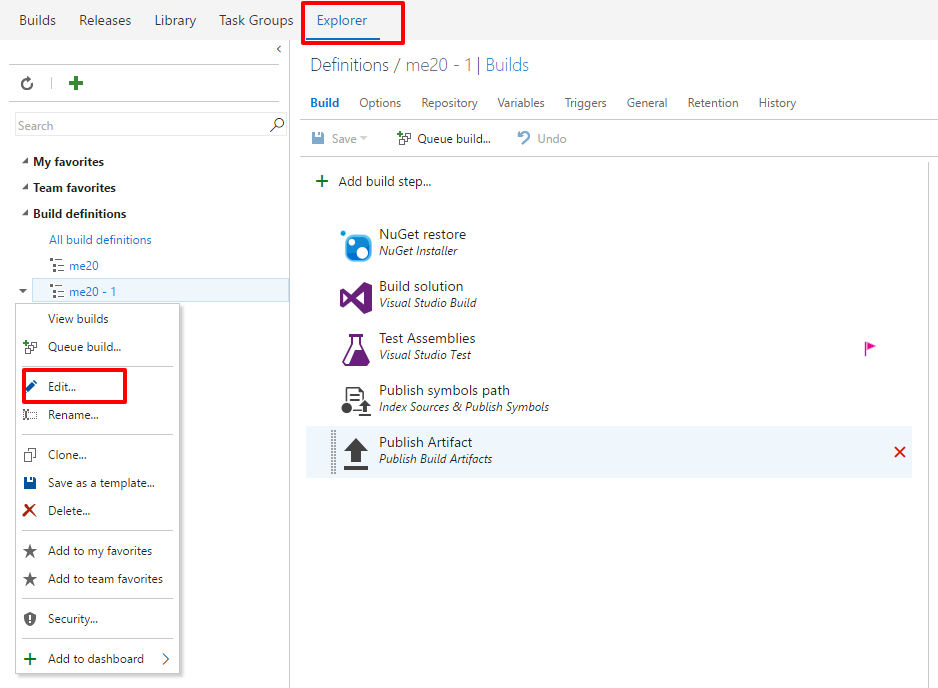
Every step can be removed or configured and you can add some of your own steps. You can configure your builds, releases, tests and place to finally deploy (ie. deployment slots). Since it’s preview version and have a lot of features I won’t go into details but I encourage you to try some of these options yourself.
Bonus
- Automatic deploys for dev environment isn’t the best idea. When you’ll deploy something manually changes will be overwritten fast. You could end up with commiting and pushing every minor change like “moved div 2px left” and “oh crap, moved this div another 2px left”. I’m developing and have my app running locally and after push I can immediatelly check if it does run smoothly (and at all) on my App Services.
- Continuous Delivery + Deployment Slots are way to go if you want automatic deploys to stage environment and possibility to push changes from stage to production just after being allowed to do so. Let me know in comment’s if you want to read more about this.